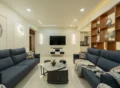
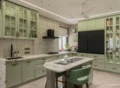
The 3D render looked perfect. Then the wardrobe door hit the bed, the main switch ended up behind the sofa, and the false ceiling made the room feel smaller than expected.
Such problems often arise when a visual design is not properly coordinated with site conditions. A 3D interior design shows how a space could look, but successful execution depends on accurate measurements, approved materials, technical drawings, and careful installation.
This interior site execution checklist covers 10 essential checks to help homeowners avoid costly changes, delays, and differences between the approved design and the finished space.
10 Checks to Complete Before Interior Work Begins
At Shades & Shapes, we believe good interior execution starts with practical planning. Review these checkpoints before approving materials, starting fabrication, or scheduling installation.
1. Check Actual Site Measurements, Not Just the 3D View
A 3D design may show a perfect layout, but the site has to support it. Before execution, verify wall lengths, ceiling height, door openings, window positions, and existing structural elements such as beams and columns. Even a small difference can affect wardrobe shutters, kitchen cabinets, or built-in furniture.
Ask your interior designer to take or confirm site dimensions before the final drawings are approved. This matters most for customised furniture, where wrong measurements lead to costly modifications. Walls in many buildings are not perfectly straight, so ask how the designer will handle uneven surfaces.
2. Confirm Furniture Dimensions and Movement Space
A sofa may look well proportioned in a render but leave very little walking space in the real room. Compare the dimensions of beds, dining tables, sofas, and TV units against the available floor area.
Think about daily use: how doors and drawers open, whether dining chairs can be pulled out comfortably, and whether people can walk around furniture without obstruction. Good interior design should make everyday activities easier, not just make the room look attractive.
3. Approve Physical Materials and Finishes
Colours and textures look different on a screen than in real life. A laminate shown as warm beige in a render may look cooler under your home’s lighting, and a glossy surface may reflect more light than you expect.
Before execution, check physical samples of laminates, tiles, stone, paint, fabrics and hardware, ideally in the room where they will be used. Your designer should also confirm the brand, finish, and specification wherever these affect the approved design. Get these approvals in writing so the finished result matches what was agreed.
4. Review Electrical Points and Lighting Placement
Lighting should be planned before ceiling work, painting and furniture installation. Review the positions of ceiling lights, pendant lights, switches, sockets, AC connections and concealed lighting strips against the furniture layout.
For example, a bedside switch should be reachable from the bed, and a kitchen appliance should have a suitable power point nearby. If the electrical layout is finalised too late, changes may mean cutting into finished walls or ceilings. Confirm all technical and safety requirements with qualified electrical professionals before installation.
5. Coordinate Ceiling Height, AC and Other Services
False ceilings, decorative lighting and concealed services need coordination before site work begins. A ceiling design that looks impressive in 3D may reduce usable height or clash with AC ducts, sprinkler systems, fans or existing beams.
Review ceiling levels and service locations together, particularly in apartments and offices with limited overhead space. An office interior designer in Ahmedabad should also coordinate with the building’s existing systems and the relevant technical teams before installation starts.
6. Review Storage and Internal Furniture Details
A 3D render usually highlights the outside of a wardrobe, kitchen or storage unit. The internal arrangement decides how useful it will be after handover.
Before production, confirm shelf heights, hanging space, drawer sizes, loft access, hinges, handles, and where frequently used items will go. In a kitchen, check appliance dimensions and storage needs. In a bedroom, plan around your actual clothing and luggage rather than choosing a layout only for its appearance.
7. Match the Design with Your Approved Budget
A premium-looking 3D design may include materials, lighting features, or custom furniture that cost more than you planned. Before approving it, ask for a detailed quotation that explains the scope of work, material specifications, quantities, and exclusions.
Clarify whether the estimate includes civil work, electrical work, carpentry, installation, hardware, taxes, and finishing. If the budget needs adjusting, ask your designer to suggest practical alternatives instead of swapping materials randomly during execution. This keeps design decisions linked to real costs.
8. Finalise Technical Drawings Before Carpentry Starts
Do not rely on a 3D image alone for execution. Carpenters and installers need clear technical drawings showing dimensions, elevations, sections, materials, and installation details for their work.
Before fabrication begins, approve the final drawings for wardrobes, kitchen units, TV panels and other customised furniture, and keep a signed copy. Changes after manufacturing starts can mean extra material, labour and time. Make sure the latest approved drawings are available to everyone on site.
9. Plan Site Logistics and Inspect Work at Key Stages
Before work starts, check your housing society or building rules. Many societies and commercial buildings have restrictions on working hours, noise, material movement, and lift use, and some require permission or a deposit. Also consider the monsoon: high humidity can affect plywood, laminates, and paint, so ask your designer how they plan the schedule and storage of materials.
Then inspect work at the right stages, before the next layer covers it. Key checkpoints include electrical wiring, plumbing, waterproofing where applicable, ceiling frameworks, and concealed fittings. During installation, check cabinet alignment, shutter gaps, tile joints, paint finish, and hardware operation. Raise issues early and record the agreed corrections.
10. Complete a Final Inspection Before Handover
Before accepting the finished interior, compare the actual space with the approved drawings, material selections and scope of work. Test lights, switches, drawers, shutters, locks, and other fittings. Check visible surfaces for damage, uneven finishing, and incomplete work.
Prepare a snag list of outstanding issues and agree on a timeline for correcting them. Also collect warranties, product details, and maintenance instructions. Whether it is a home, villa, or commercial space, a proper handover makes sure the interior is ready for practical use.
How Shades & Shapes Helps Connect 3D Design with Site Execution
Turning a 3D concept into a functional interior requires accurate planning, practical space utilisation, and coordination between design and on-site work.
Shades & Shapes offers 3D visualisation and turnkey interior solutions to help clients plan their spaces. Discuss your requirements, preferred materials, budget, and project scope before work begins.
Planning a home or office interior in Ahmedabad? Visit Shades & Shapes to discuss your project requirements and next steps.
FAQs
What should I check before starting interior execution?
Verify site measurements, furniture clearances, material specifications, electrical layouts, budget, technical drawings, and the agreed scope of work.
Why can the finished interior differ from the 3D design?
Differences may result from site constraints, material variations, inaccurate measurements, workmanship, or changes made during execution.
When should I approve interior materials?
Review material options during design development and approve physical samples and final specifications before purchasing and installation.
Are technical drawings necessary after 3D visualisation?
Yes. Technical drawings provide the dimensions and installation details needed by carpenters, electricians, and other contractors to execute the approved design accurately.
Does Shades & Shapes offer 3D design and execution?
Shades & Shapes offers 3D visualisation and turnkey interior solutions. Confirm the specific deliverables, site supervision arrangements, and execution scope before signing an agreement.